What to do with a document “created by a newer version of OpenOffice”

Are you using Apache OpenOffice? Have you recently tried to open a .odt, .ods or .odp file and received this error message? “This document was created by a newer version of OpenOffice. It may contain features not supported by your current version.

In this case, the document probably wasn’t created in OpenOffice, but in LibreOffice, a successor project. LibreOffice 7.0 introduced support for OpenDocument Format (ODF) 1.3, which includes many new features and benefits.

LibreOffice and Apache OpenOffice share the same roots, and while Apache OpenOffice’s last major release (4.1) was back in 2014, LibreOffice has since been developed much further with extra features and updates.

LibreOffice is still free and open source software, of course, so to get the most out of newer documents, download LibreOffice and give it a try!

New Beginner LibreOffice Tutorials and Videos from Paul Sutton

LibreOffice’s documentation community creates handbooks, guides, tutorials and other resources to help users get the most out of the software. Everyone is welcome to join the team and help out – it’s a great way to build up experience for a possible career in technical writing!

Paul Sutton is producing a series of blog posts and videos aimed at newcomers to LibreOffice, explaining some of the basics. He also has some extra videos here – check them out.

A big thanks to Paul for his work, and making his content available under a Creative Commons license, for everyone to share! Follow him on Twitter and Mastodon.

LibreOffice Tips & Tricks: Replacing Microsoft Fonts

Fonts are one of the main culprits of LibreOffice interoperability problems with Microsoft Office documents, when viewed from the end user’s point of view. In fact, Microsoft Office document are often using one of the default fonts – either the old “Core Fonts for the Web” (deprecated in 2002, but still in use) or the new “ClearType Fonts” (launched in 2000, and now adopted by Windows and Office) – which are not always available in LibreOffice, as they are proprietary and cannot be distributed with open source software. Also, in the case of ClearType fonts, the license is strictly connected to the Windows and/or Office license, so to legitimately use them with LibreOffice you need a Windows license where they are included.

When LibreOffice opens a Microsoft Office document, it will replace the fonts which are not available with one of the default Liberation fonts, which are metrically compatible with Arial (Liberation Sans), Courier New (Liberation Mono) and Times New Roman (Liberation Serif), but will have an impact on the visual appearance of the document if they replace a different font (in this case, the user will usually start to complain loudly about LibreOffice, without even checking if the contents are still there…).

To reduce the impact of this problem, which cannot be eliminated, at least until users stop using fonts creatively, LibreOffice offers a specific feature, a font replacement table that can be configured according to the user’s needs, and is among the program’s options. If the table is configured correctly, LibreOffice replaces the fonts with those metrically compatible – or simply more similar – defined by the user, and this in most cases will prevent the document from looking different. Luckily, there is a large number of free open source fonts available, with some specifically developed to replace Microsoft fonts as in the case of Croscore Fonts, from several online repositories. I suggest Google Fonts, as the website provides not only the font files but also all the associated legal resources, including the license.

My LibreOffice font replacement table, which has been developed over the years, includes the following font pairs (the first is replaced by the second, which is installed on my Linux PCs): Arial -> Arimo, Calibri-> Carlito, Cambria -> Caladea, Consolas -> Inconsolata, Courier New -> Cousine, Franklin Gothic -> Libre Franklin, Georgia -> Neuton, Gill Sans -> Cabin, Impact -> Oswald, Palatino -> Crimson Text, Perpetua -> Lustria, Times New Roman -> Tinos, Twentieth Century -> Spartan, and Verdana -> PT Sans. This is how it looks in LibreOffice:

Installing fonts is rather easy, but for those who are not familiar with the procedure there are a couple of articles which provide a quick tutorial: Windows & macOS, and Linux.

LibreOffice Tips & Tricks: Converting 4:3 Slides into 16:9 Slides

(clicking on the image will open a large view of the same)

Today, the majority of screens and projectors is using the 16:9 aspect ratio, while in the past has been using the 4:3 aspect ratio. So, many people have a large number of slide decks based on the old 4:3 aspect ratio, which have to be converted to the new 16:9 aspect ratio. Using LibreOffice Impress in the right way, which means that all slides are based on a slide template, the conversion procedure is rather trivial, and this blog post provides a step by step tutorial.

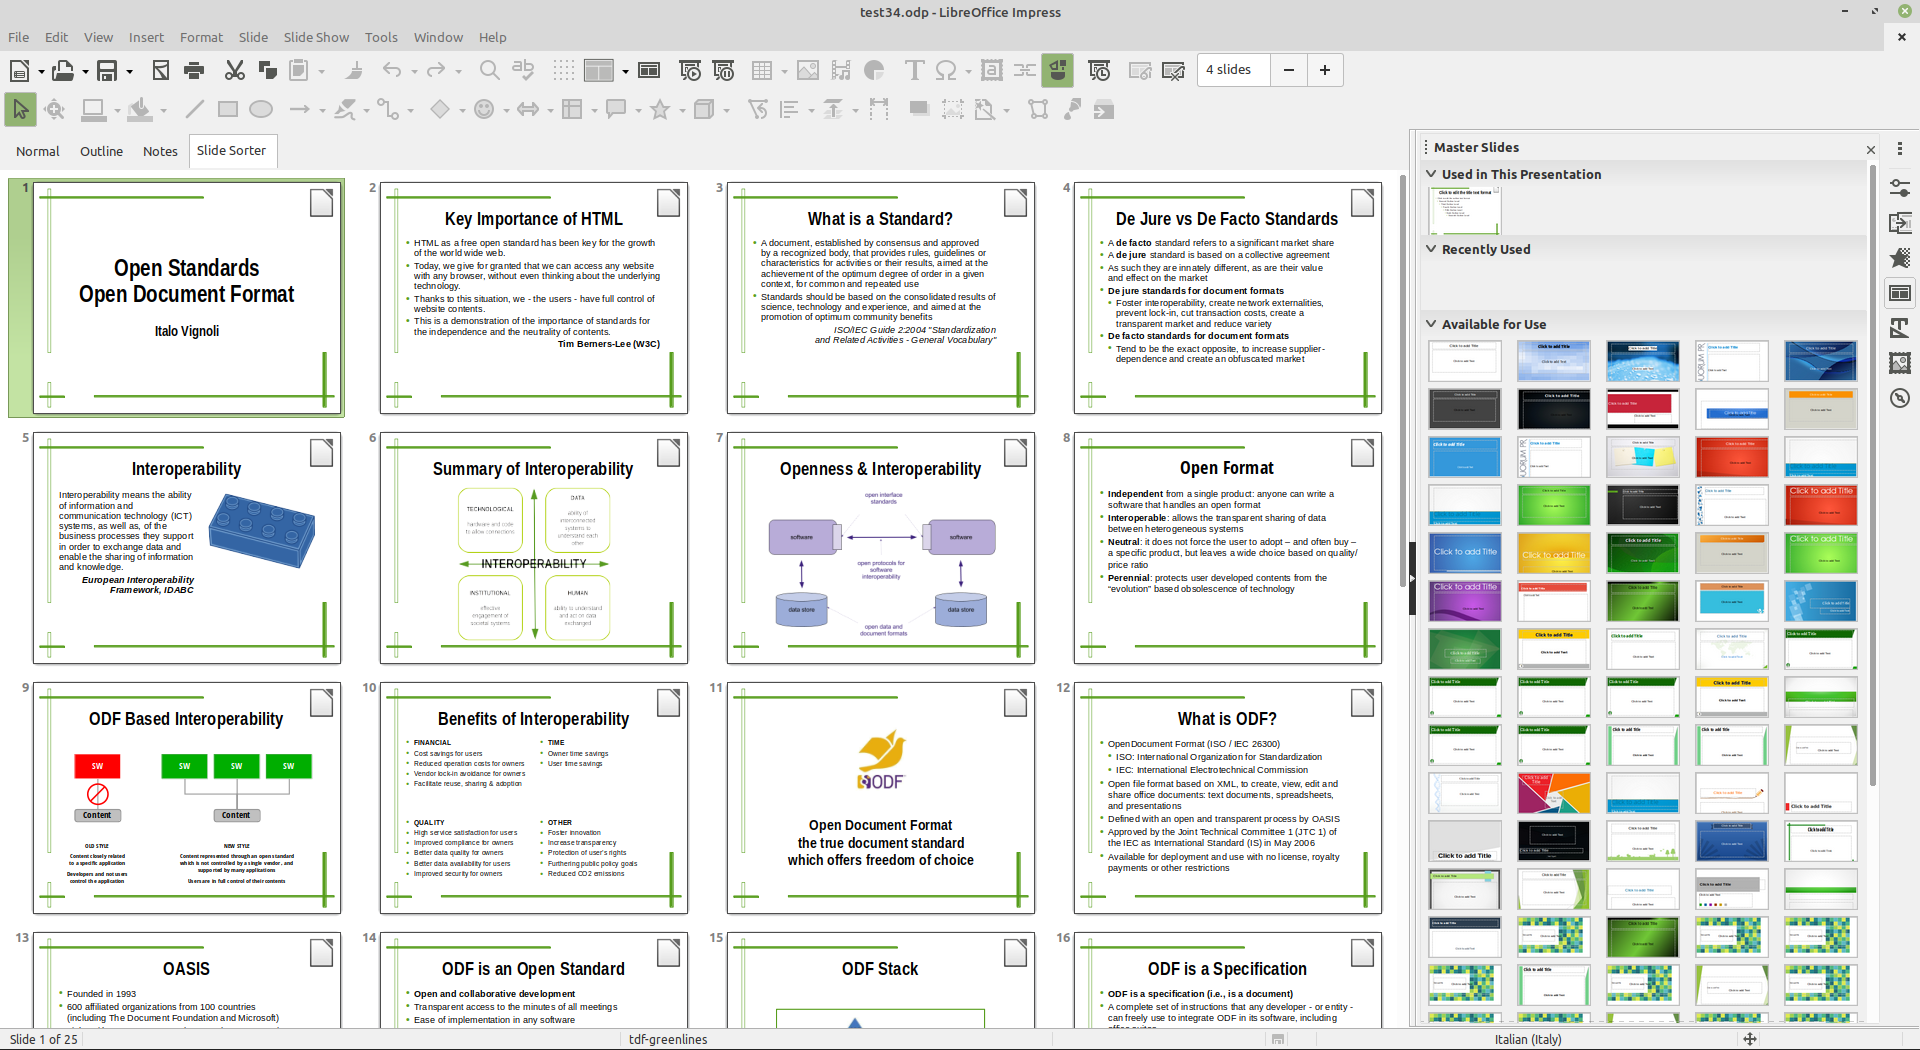
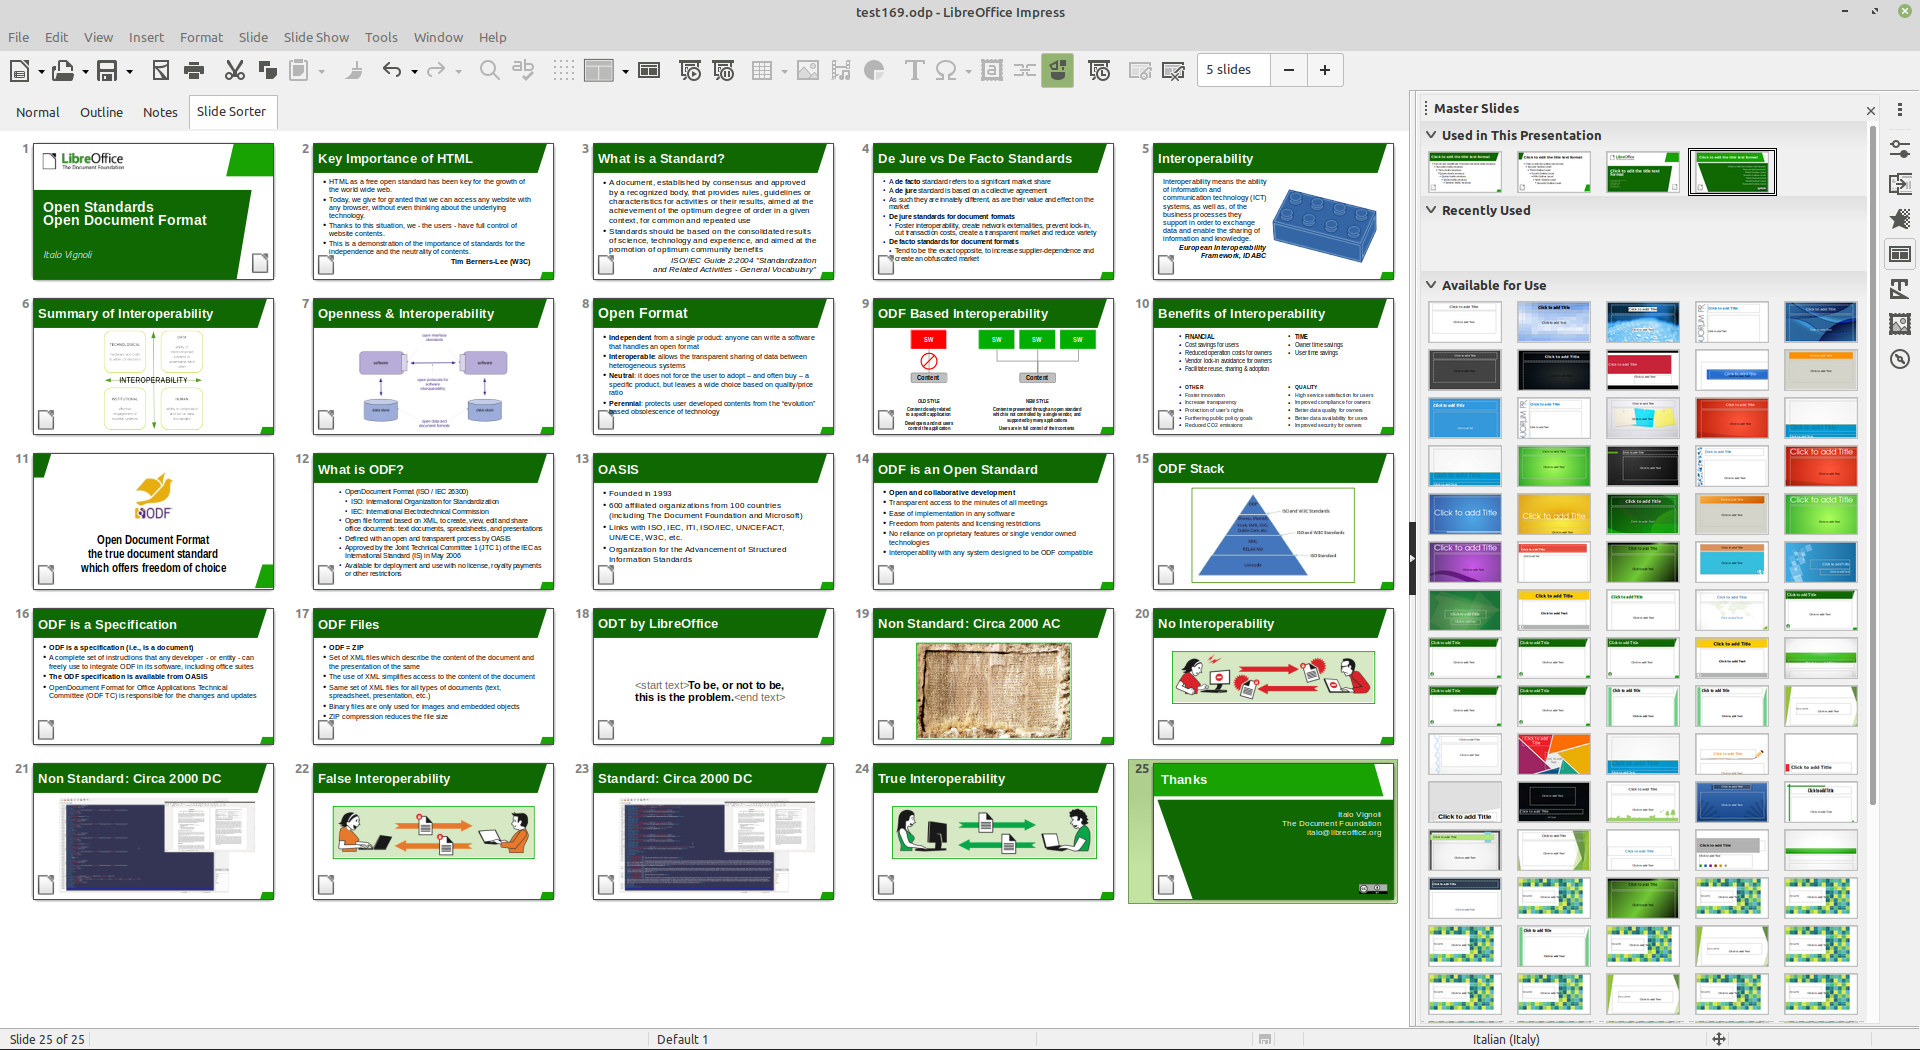
Of course, we start by opening the old 4:3 slide deck, and switching to the Slide Sorter view. We select all slides using the Edit > Select All menu command, and then we copy all slides using the Edit > Copy menu command.


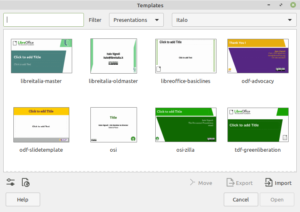
To create the new 16:9 slide deck, we use the File > New > Templates… menu command. From the Templates window, which opens on top of the 4:3 slide deck, we select a 16:9 template. In this case, we will open the “tdf-greenliberation” template on the lower right corner of the Templates window.


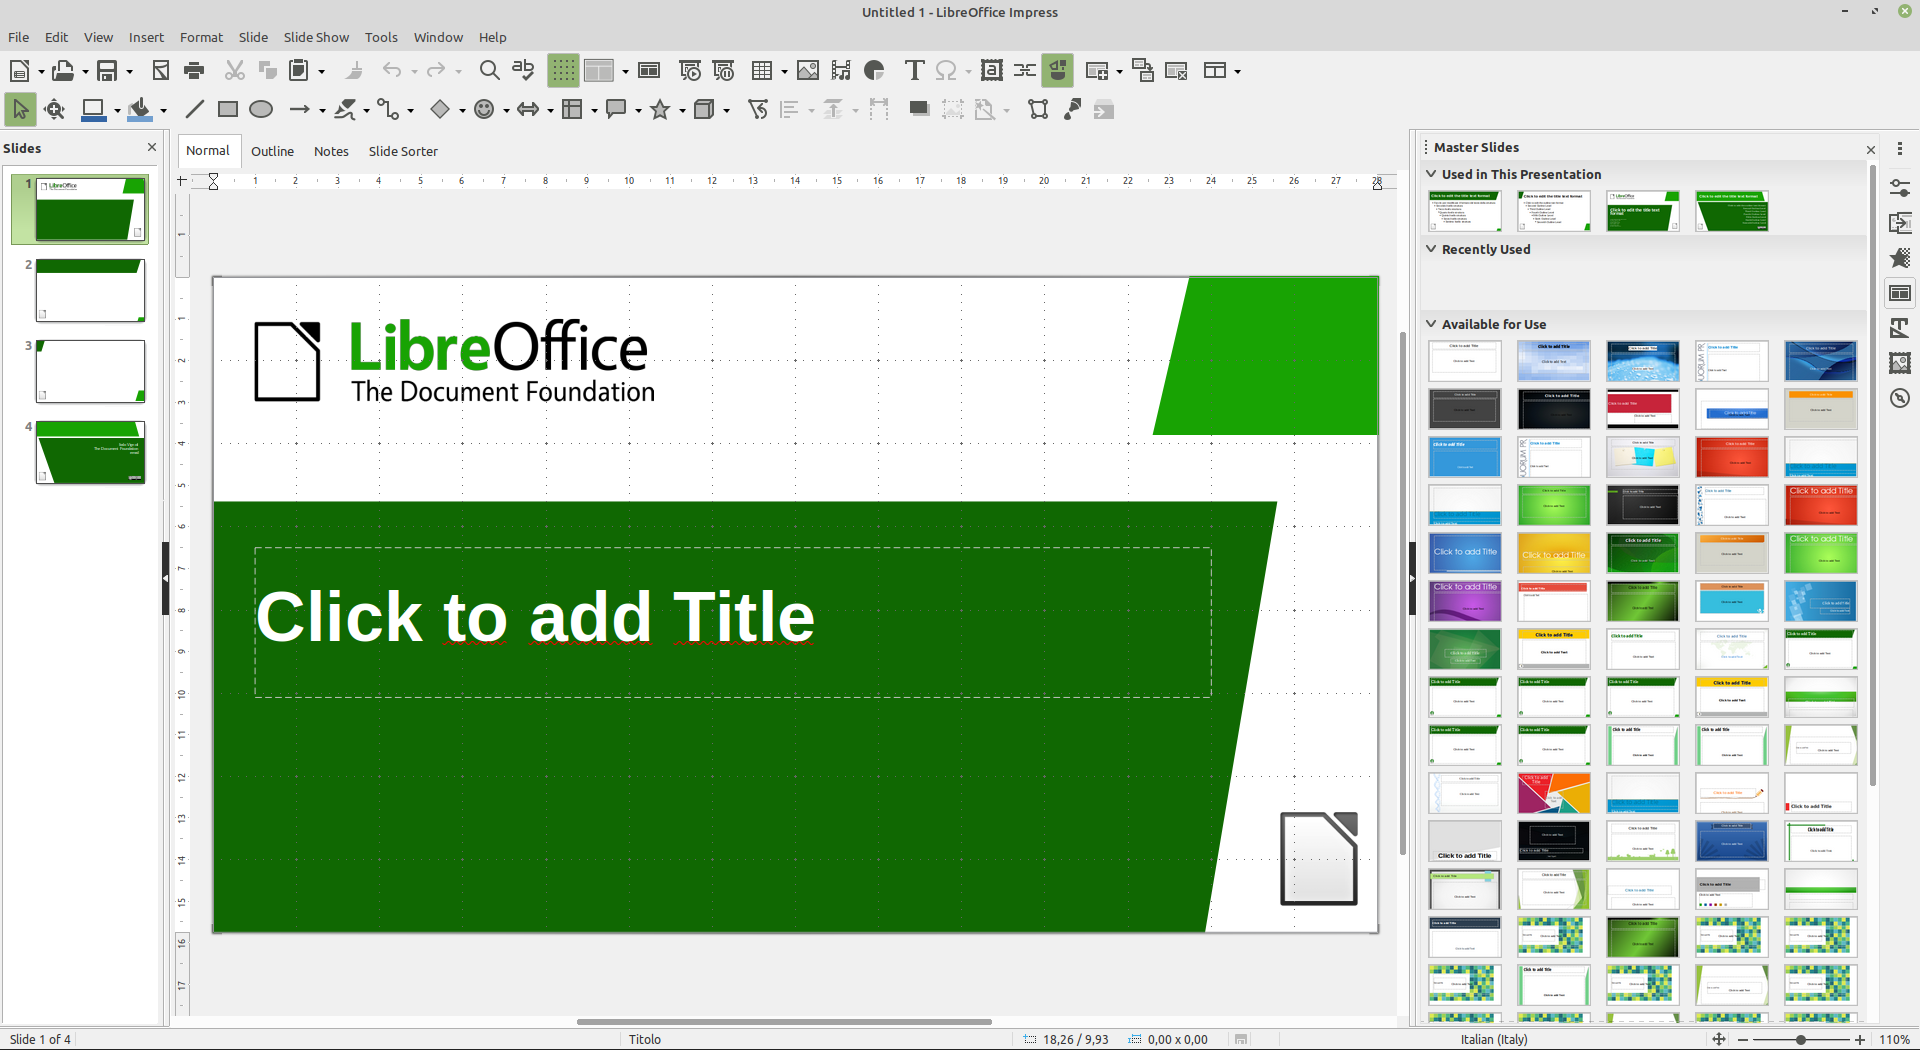
The new 16:9 slide deck will open showing the title slide, but we will switch to the Slide Sorter view to paste the 4:3 slides.


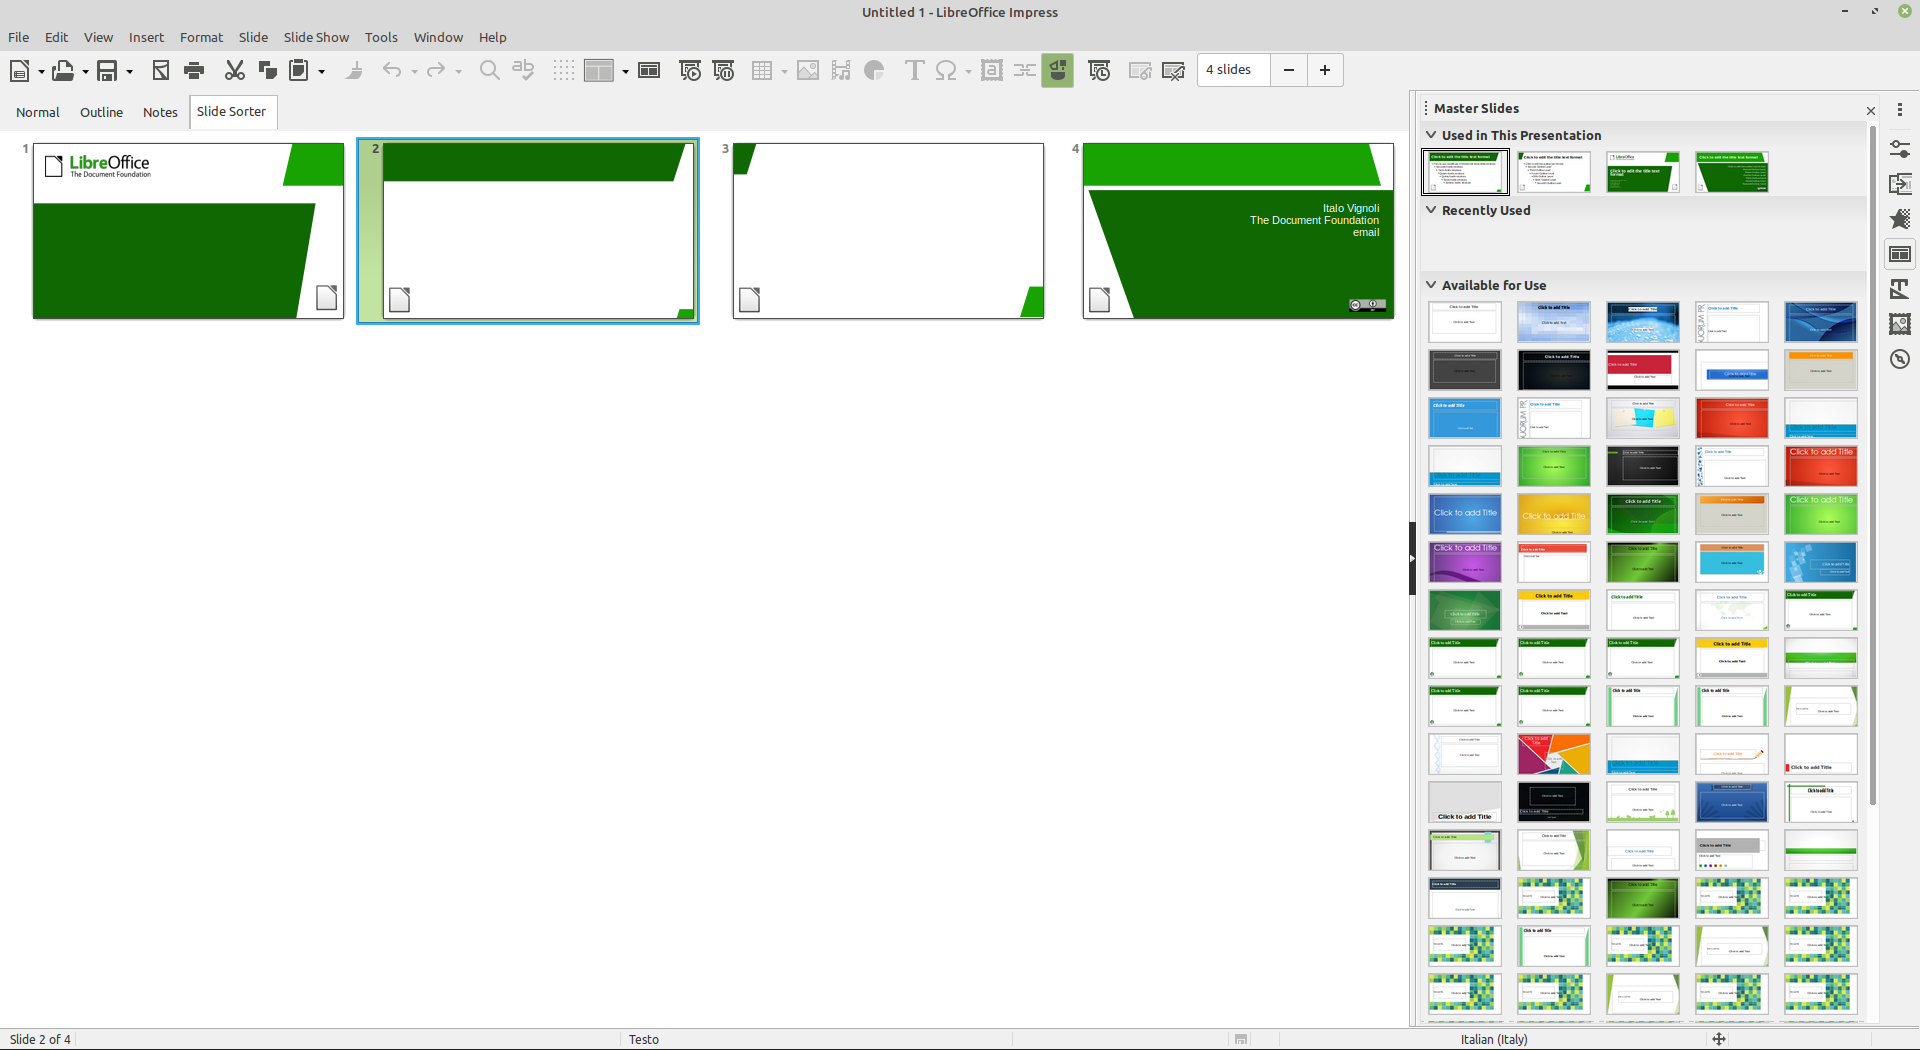
You have to select one of the slide thumbnails before using the Edit > Paste menu command.


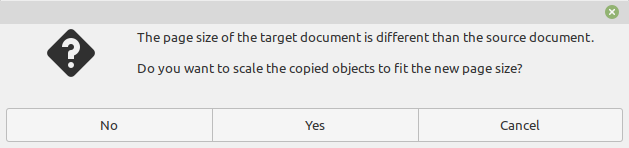
A dialog windows will show up almost immediately, asking if you want to scale the objects to reflet the different slide size of the target document. The answer is NO.

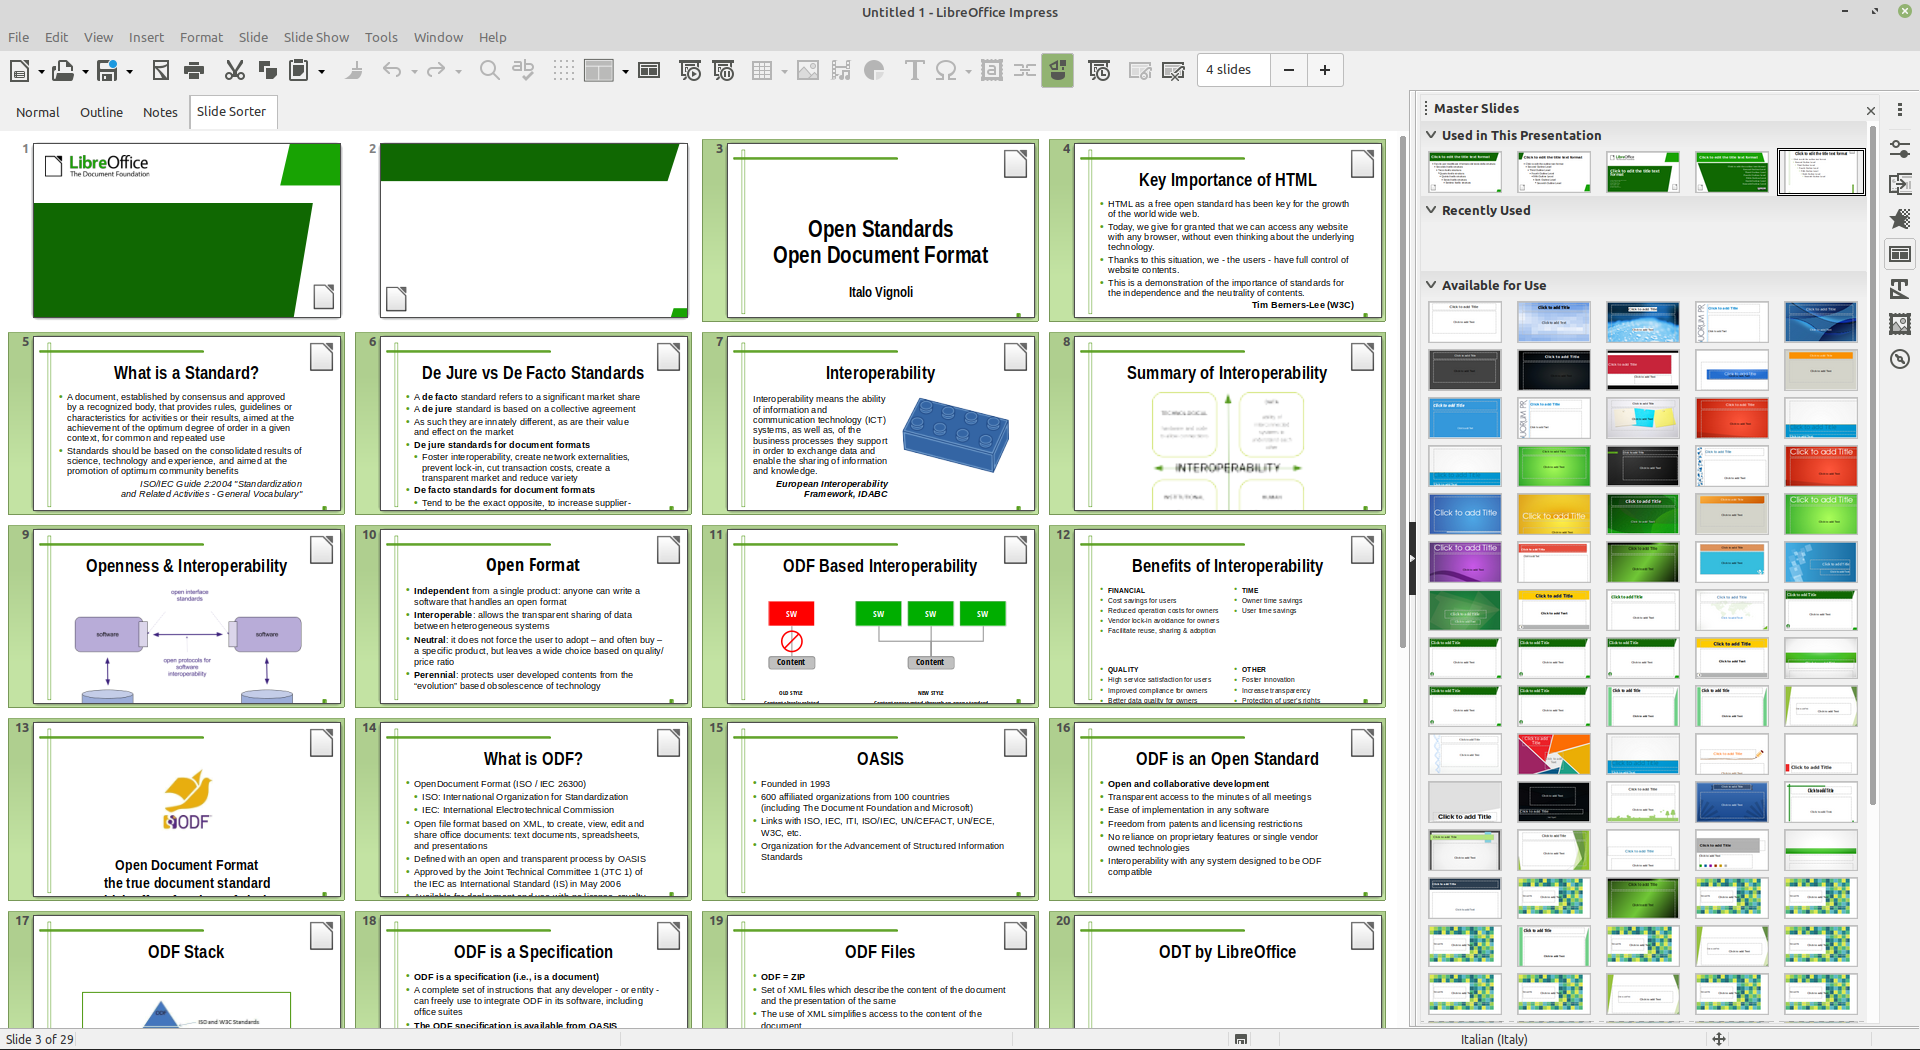
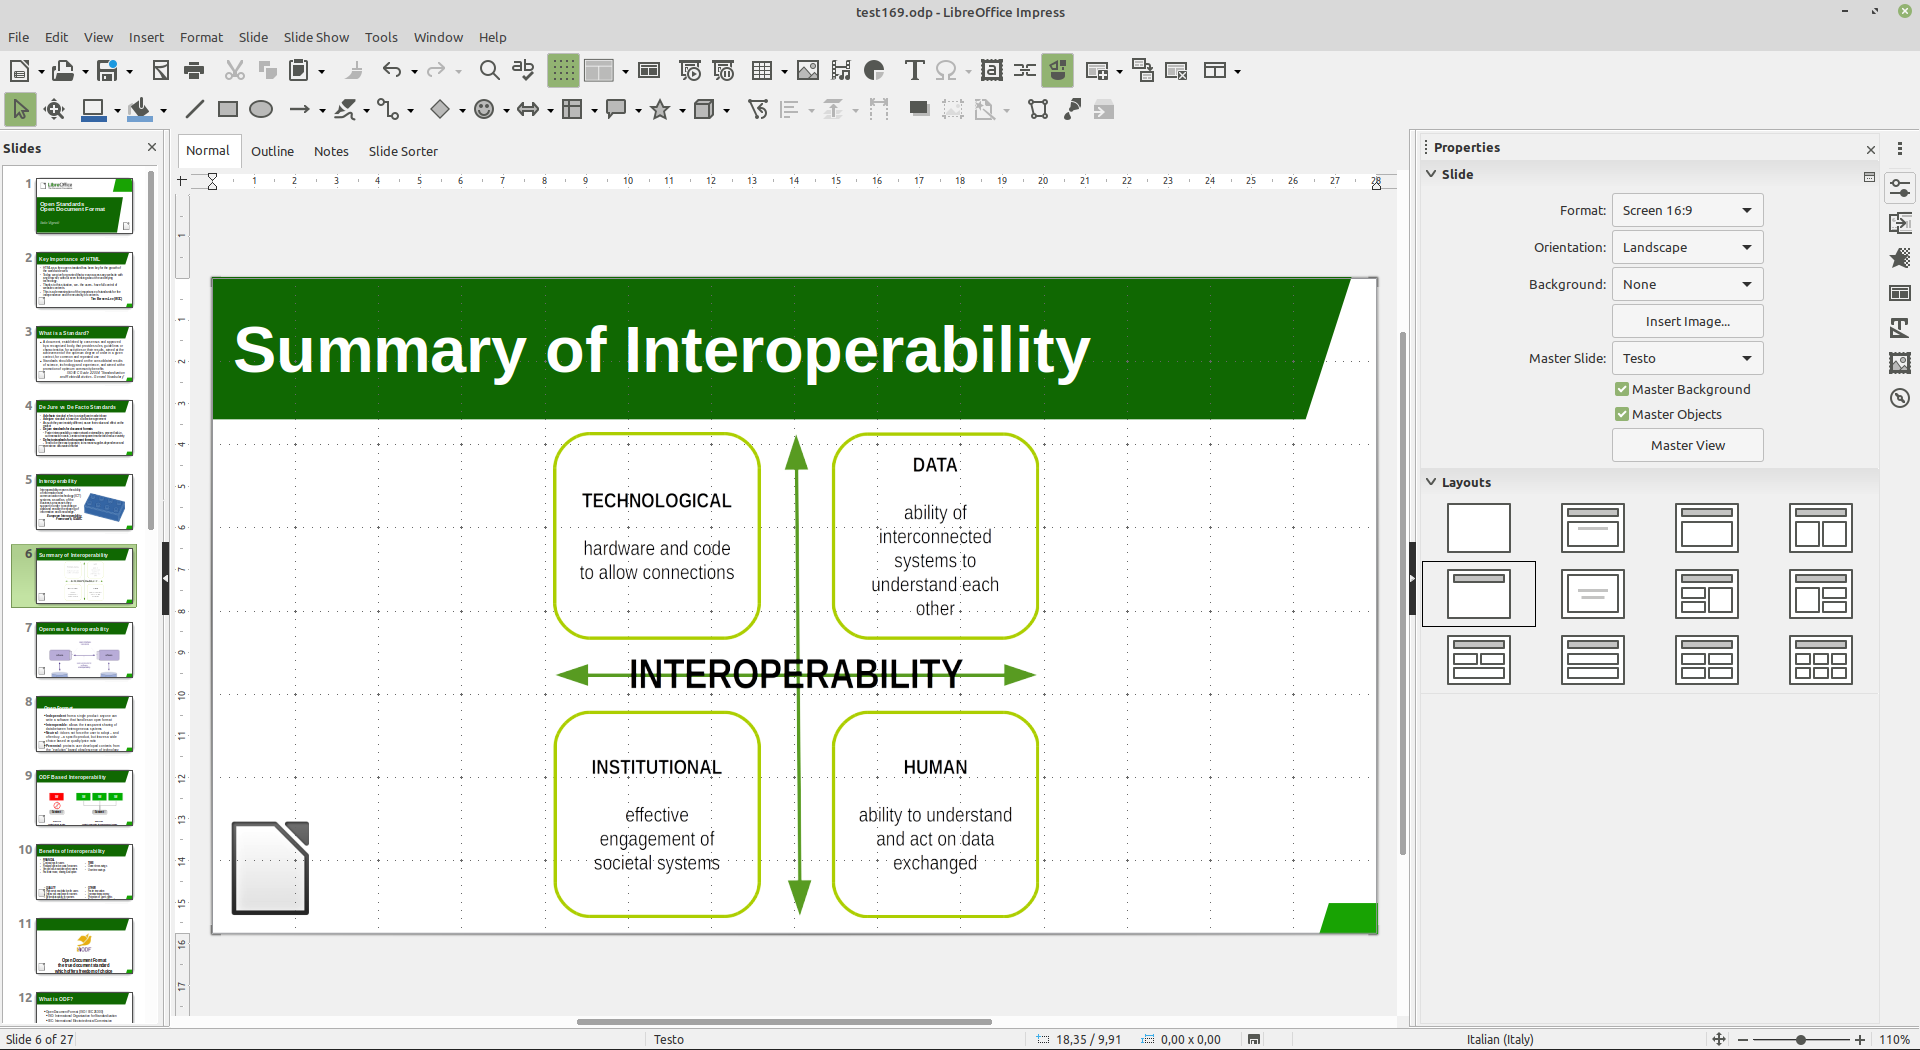
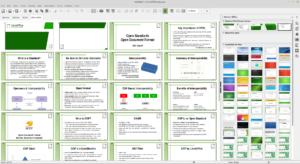
The result will be the following. All the pasted 4:3 slides will now have the 16:9 aspect ratio, but the slide master will still be the old one. This is expected, so no need to panic.


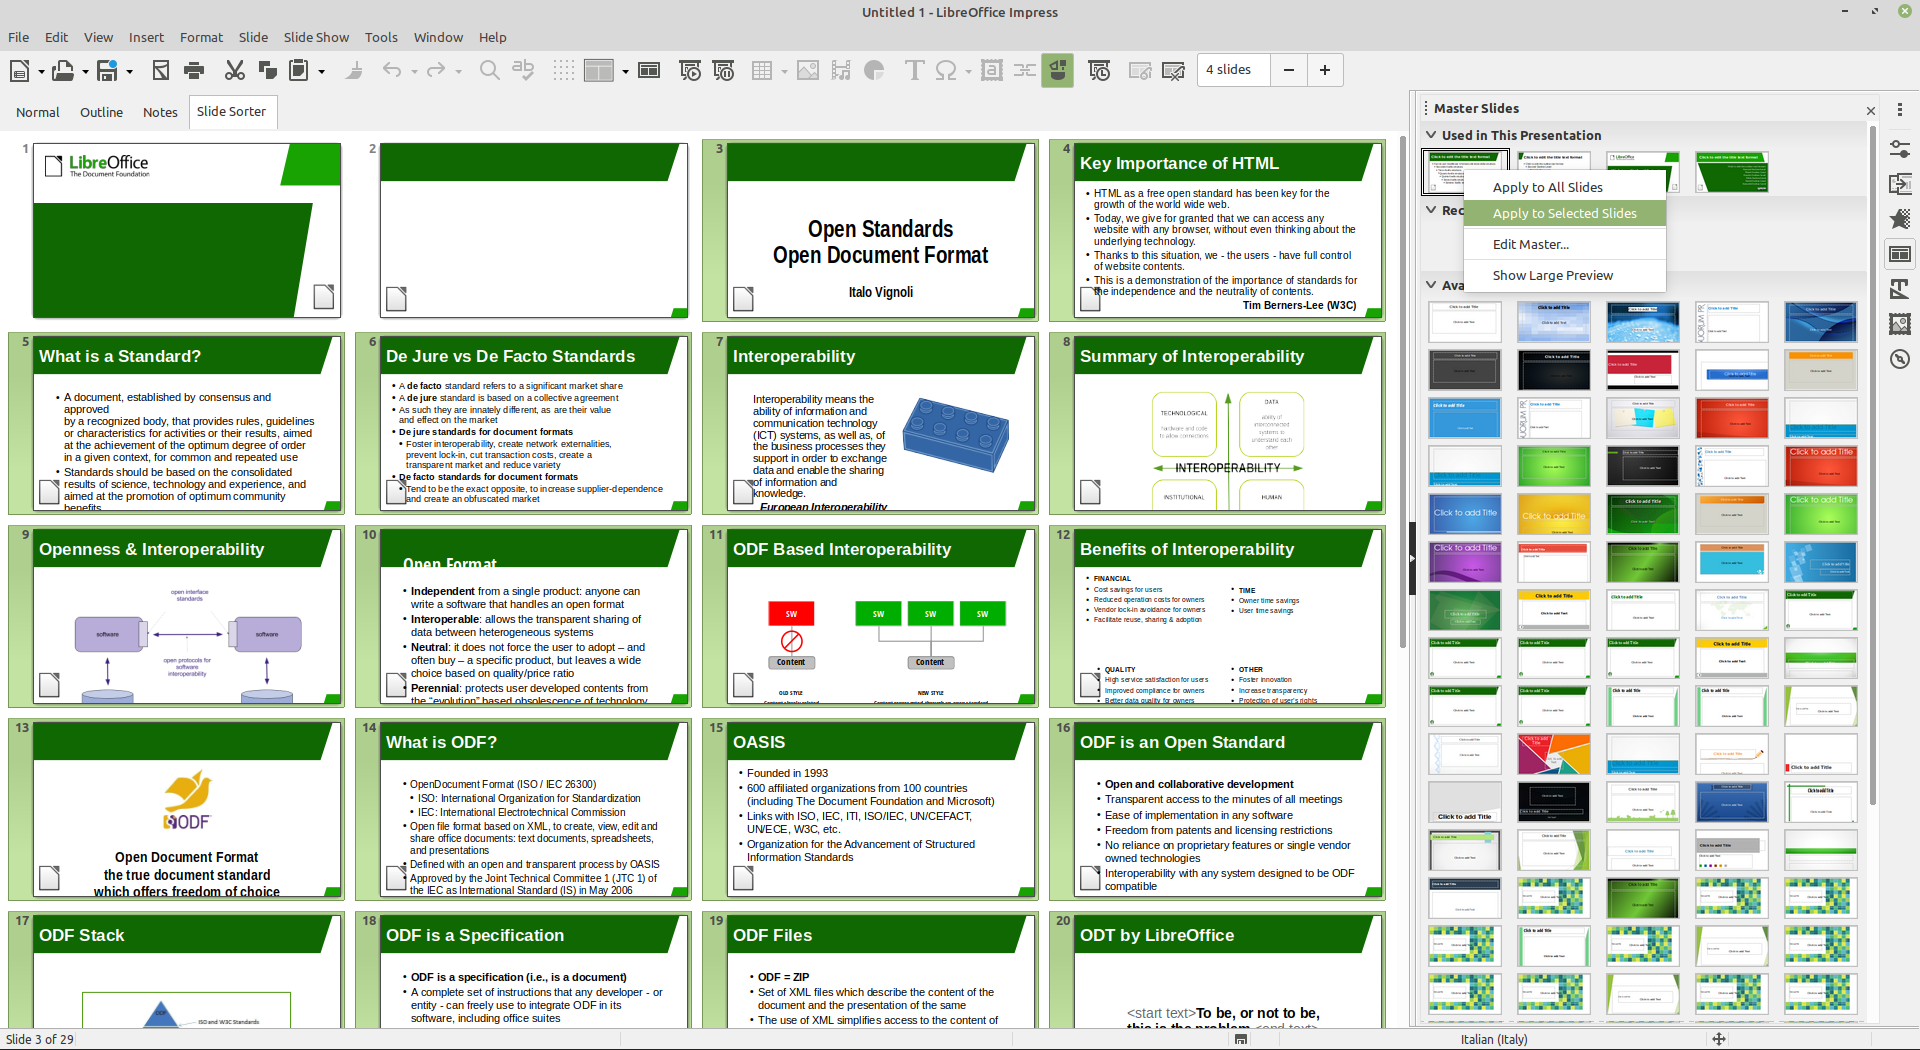
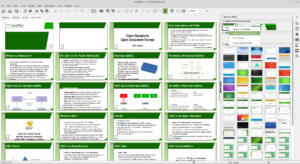
Using the Master Slides section in the Sidebar, and right clicking on the template of choice, you can change the aspect of all slides at once.


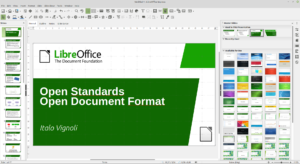
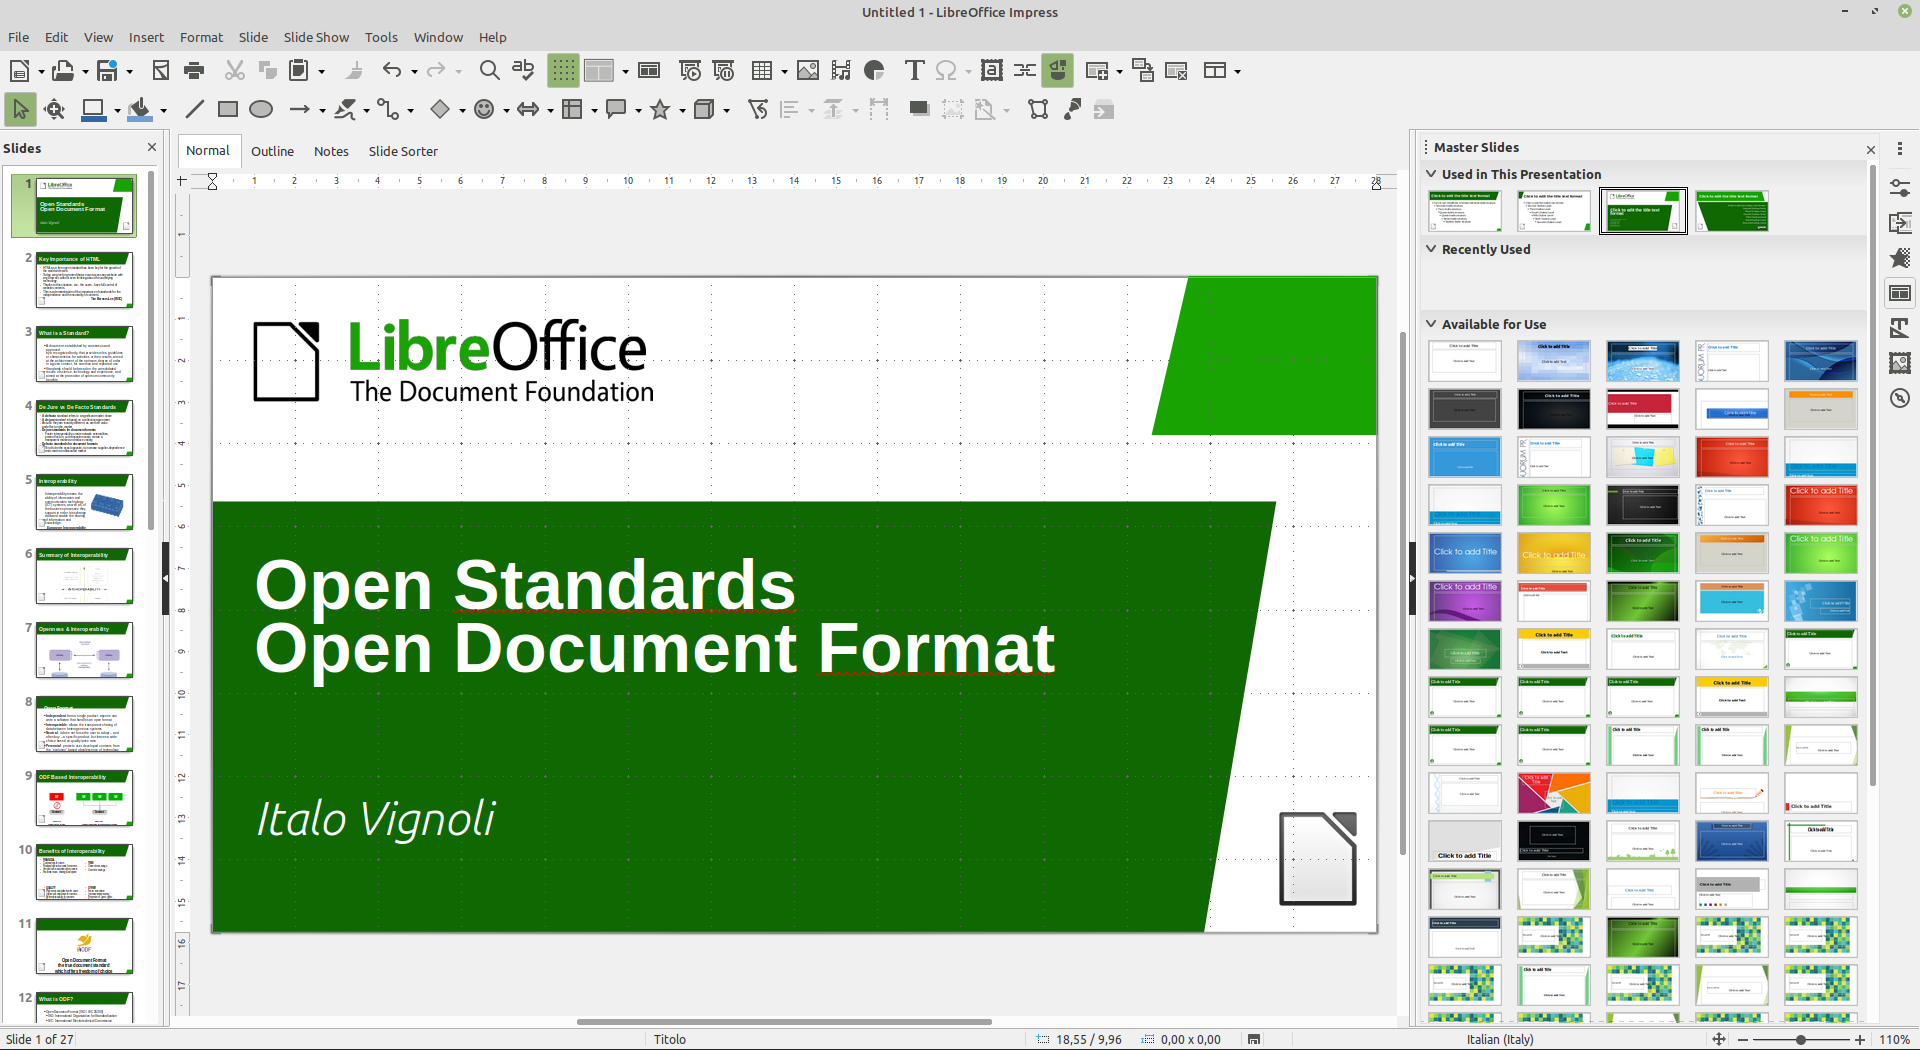
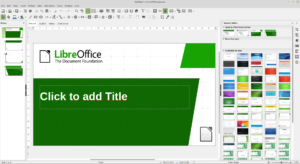
Using the same procedure, you can change the aspect of individual slides to reflect specific needs. For instance, this is the tile slide after the Title Master has been applied.


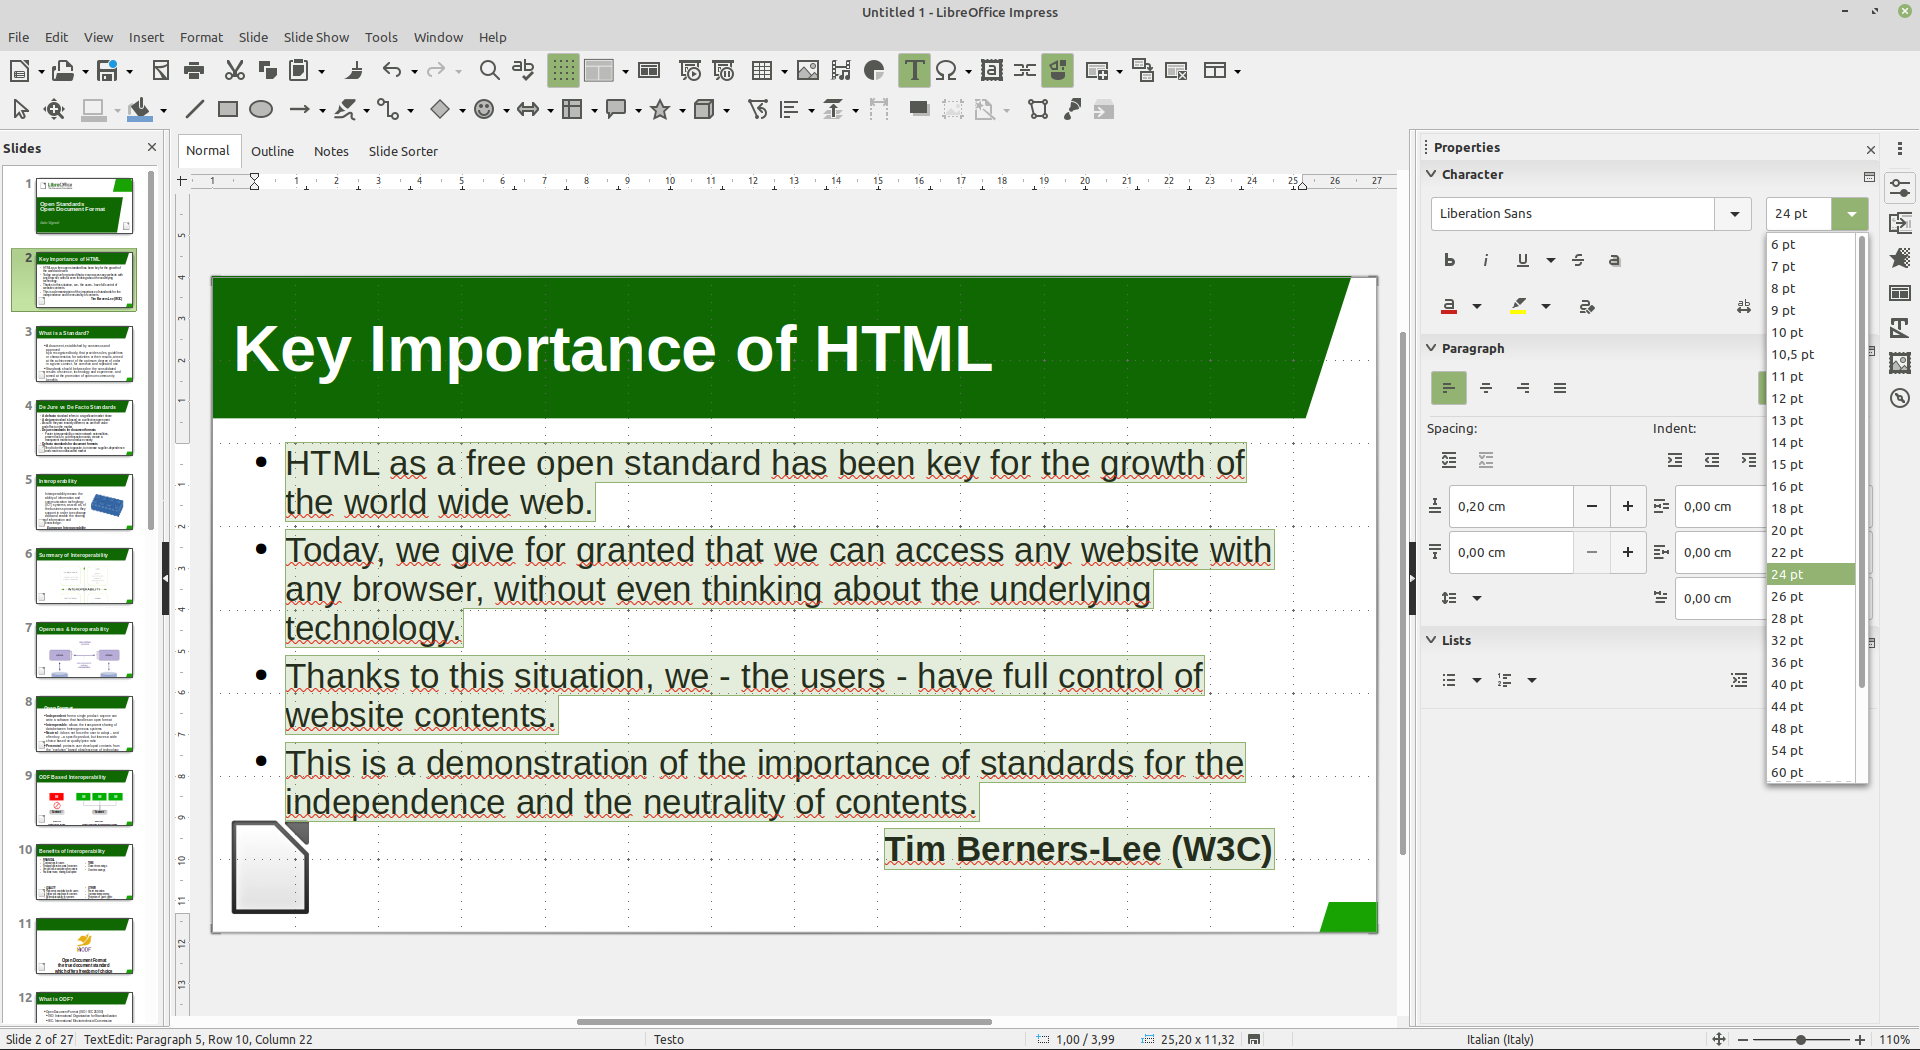
Some slides will still need some specific tweaks to make their aspect compatible with the new slide master. For instance, the size of this text has to be reduced to avoid overlaps with slide master elements.


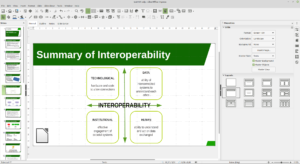
Of course, all visual elements have to be resized, as they will use more vertical space than allowed by the 16:9 aspect ratio, or moved, to maintain the visual appearance.


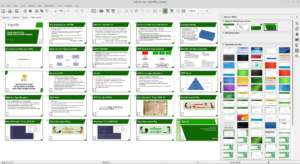
Once all slides have been edited, this will be the final result. Believe me, it takes more time to describe the process than to apply it to a slide deck.


Quick video tutorial: Starting LibreOffice and its modules on Windows 10

Videos created by our community are a great way to spread the word about LibreOffice, and help new users to get the most out of the software. This video, from Harald Berger, summarises the different ways to start LibreOffice 6.4 – and its various modules – under Windows 10:

Please confirm that you want to play a YouTube video. By accepting, you will be accessing content from YouTube, a service provided by an external third party.

YouTube privacy policy

If you accept this notice, your choice will be saved and the page will refresh.

LibreOffice Tuesday T&T: Writer Templates

A template is a draft document that you can re-use over and over to generate new documents, based on the same basic format and with the same headers, footers, styles and formats. In this way you can make all your documents look the same. For instance, it enables you to create a single template for use whenever you wish to write a letter with a standard header. You can create a template for use in Writer (text documents), Calc (spreadsheets), Impress (presentations), and Draw (drawings).

Creating a Writer template is easy. First, create the template as any other document in Writer, without adding any text but defining all the other elements of the document: the page size and margins, with settings for headers and footers; the styles for the text, with character and paragraph formatting; etc. Once all the details are in place, you can save the new template, using File > Save As > and choosing ODF Text Document Template (OTT) from the drop-down menu. You can choose any folder, but the best option is to save the new template in the Templates Folder, which you have defined in Tools > Options…, as in this case the template will show up every time you choose New > Templates… > Documents.

After you have saved the new template, you can make it the default for all the new text documents by going to File > Templates… > Documents, and then right clicking on the document icon and selecting Set as Default. This is especially handy if you have a preferred layout for your new documents, based on your personal preferences.