LibreOffice: Advent Tip #4

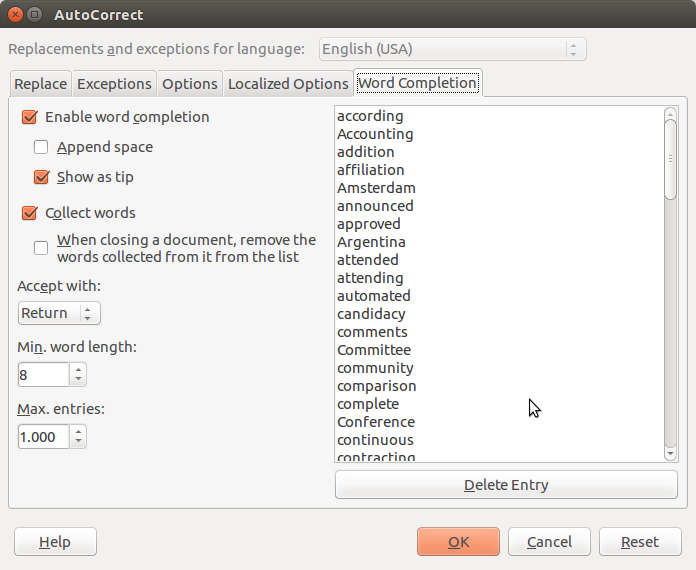
LibreOffice has a comprehensive AutoCorrect feature, which can be accessed from the menu Tools > AutoCorrect Options… The command opens a dialog window with five tabs: Replace, Exceptions, Options, Localized Options, and Word Completion. Replace provides a list of symbols and words which might be entered using the wrong character or misspelled, and will be corrected automatically once entered. The list can be improved by the user, with the addition of other words. Exceptions provides a list of the words which do not follow the rule, and can also be improved by the user with the addition of other words.

AutoCorrect_001
Replace
AutoCorrect_002
Exceptions


Options are pre-configured, and are correcting some of the most common typing mistakes, such as two initial capitals, double spaces, and empty paragraphs. Localized Options (no screenshot) provides some additions to the previous tab, related to specific language issues. Last, Word Completion provides a list of words which can be autocompleted by LibreOffice once the feature has been enabled.

AutoCorrect_003
Options
AutoCorrect_005
Word Completion


LibreOffice: Advent Tip #3

LibreOffice Impress allows to create a nice Photo Album with a few clicks of the mouse. First, you open an empty presentation. Second, you access the feature with Insert > Media > Photo Album. Third, you press the Add button to select your pictures from your hard disk. Fourth, you choose your options (slide layout, caption, aspect ratio) and then press Insert Slides to create the Photo Album, and – in a few seconds – you get the final product.

Create Photo Album_002
Press Add to select pictures
Create Photo Album_003
Select options and press Insert Slides
Untitled 1 - LibreOffice Impress_004
Your Photo Album is ready in less than a minute

LibreOffice: Advent Tip #2

Save Impress Slides as Images

availableformats
Export File Formats

LibreOffice allows to export single Impress slides as images, by accessing the menu File > Export…, and then by choosing one of the available file formats. Using this feature, exporting all the slides of an Impress presentation is a rather tedious operation.

Luckily, there is a LibreOffice extension which allows to export all slides as images in a single operation. In addition, it allows to choose the file format and configure the output.

exportasimages
LibreOffice Extensions website

To install the extension Export as Images, you have to access the LibreOffice Extensions website, search for the extension, download the OXT file, and install it using the Extensions Manager (which can be accessed from the menu Tools > Extension Manager…, then clicking on the Add… button, and following the instructions).

exportasimagesdialog
Export as Images Dialog Window

Once installed, Export as Images creates a new menu entry File > Export as Images…, which opens a dialog windows where you can choose the directory, the file name, the file format, the size (by entering the requested width or height in pixels), and color/grayscale.


LibreOffice: Advent Tip #1

Ask LibreOffice
ASK LibreOffice
LibreOffice FAQ
LibreOffice FAQ on TDF Wiki


We are approaching the end of 2015. We have decided to celebrate the month of December with our own version of the Advent Calendar: one simple tip per day, to make the use of LibreOffice more enjoyable or more productive.

Today, December 1, we start by pointing LibreOffice users to Ask LibreOffice and to the FAQ on TDF Wiki. These two resources provide a number of tips based either on questions asked by users (Ask) or on the experience of long time LibreOffice users (FAQ).

They are both useful, and we warmly invite LibreOffice users worldwide to leverage these resources provided by community volunteers.